Friday, December 25, 2015

X-Wing: T-70 hype with Poe

Remember when I killed 9 TIEs without trying?

This is not Armada!  Yes, I know, but I also play a good amount of X-Wing in the tournament scene.  I know most of you guys have seen The Force Awakens already and are pretty pumped to play with Poe and the T-70s, so I figured I'll make some lists.  This is what I came up with and I think it's pretty good, well-rounded and competitive.  X-Wings haven't seen play in the competitive meta for a long time, but hopefully with R2 and Integrated Astromech, they will be somewhat better B-Wings.  If you really think about it, Integrated Astromech pretty much gives them all an extra HP as a pseudo, one-time use shield, but the best thing about it is that it's reactionary and can potentially block a Direct Hit.  That in itself is tremendous.. too bad FFG only decided to pack one of these into each T-70 expansion pack.

OK, the first list:

POE (100)

Poe Dameron — T-70 X-Wing 31
Veteran Instincts 1
R2-D2 4
Autothrusters 2
Ship Total: 38
 
Blue Squadron Novice — T-70 X-Wing 24
R2 Astromech 1
Integrated Astromech 0
Ship Total: 25
 
Blue Squadron Novice — T-70 X-Wing 24
R2 Astromech 1
Integrated Astromech 0
Ship Total: 25
 
Bandit Squadron Pilot — Z-95 Headhunter 12
Ship Total: 12

This basically goes for a purely defensive build with Poe + 2 Blues with Integrated Astromech and R2.  I decided to go with R2 over something like R5 because I want the extra greens after a Tallon Roll.  Being able to recover with all greens on speed-1 and 2 is amazing.  The extra Bandit there just flies around being jelly that everyone else is in the T-70s.

HELLO (99)

Poe Dameron — T-70 X-Wing 31
Veteran Instincts 1
R2-D2 4
Autothrusters 2
Ship Total: 38
 
Ello Asty — T-70 X-Wing 30
Veteran Instincts 1
BB-8 2
Autothrusters 2
Ship Total: 35
 
Tala Squadron Pilot — Z-95 Headhunter 13
Ship Total: 13
 
Tala Squadron Pilot — Z-95 Headhunter 13
Ship Total: 13

In this next list, I take both T-70 aces and bump Ello up to PS9 for the extra pilot skill.  Poe still sits comfortably at PS10 and I give BB-8 over to Ello and R2D2 for Poe.  Both come with ATs but Ello takes that to another level with his white Tallons.  With the extra points, I bump both Talas up to PS3 to outbid those pesky PS2 TLTs and call it a day.

Alright readers, I'm going to be traveling for the next couple of days to spend time with family, so expect some downtime.  Have a great holiday season!

Armada: Holiday Vassal tournament results!

The results are in!

Well, I didn't end up winning the thing, that honor goes out to my man Truthiness and his Rebel B-Wing list.  I'm waiting for a more comphrensive breakdown from a few of the forumers that wanted to do it, but overall, the entire top 4 was made out of Rebel fleets.  Here's what the top 4 looks like out of 28 participants.

Truthiness, 27 tournament points, 929 MoV (3-0)
HERO, 25 points, 695 MoV (3-0)
JJs Juggernaut, 24 points, 715 (2-1)
Gowtah, 24 points, 534 (3-0)

These were the winning lists:

Truthiness
390/400

MC80 Command Cruiser
-Garm
-Independence
-ECMs
-Adar Tallon
-Boosted Comms

Nebulon-B Escort Frigate
-Yavaris

Nebulon-B Support Frigate
-Salvation

-Wedge
-Dutch
-Jan
-4x B-Wings

A very squadron-heavy build with Independence to fling B-Wings into position, Wedge/Dutch to do the damage, and Jan to keep everything alive.  Garm gives extra tokens for activations on big turns while Yavaris and Adar allows extra attacks on the squadrons.  Since this list relies heavily on activations, you see a monstrous 390 bid to go first.

HERO
Points: 391/400

[ flagship ] MC80 Command Cruiser (106 points)
-  Admiral Ackbar  ( 38  points)
-  Home One  ( 7  points)
-  Intel Officer  ( 7  points)
-  Engine Techs  ( 8  points)
-  Electronic Countermeasures  ( 7  points)
-  XI7 Turbolasers  ( 6  points)
-  Leading Shots  ( 4  points)

Assault Frigate Mark II B (72 points)
-  Intel Officer  ( 7  points)
-  Gunnery Team  ( 7  points)
-  Electronic Countermeasures  ( 7  points)
-  XI7 Turbolasers  ( 6  points)

CR90 Corvette A (44 points)
-  Jaina's Light  ( 2  points)
-  Turbolaser Reroute Circuits  ( 7  points)

1 Dash Rendar ( 24 points)
2 YT-2400 (32 points)

I went with self-efficient squadrons in the form of the YTs and took a MC80 Battleship variant with Ackbar, MKII and TRC90.  I also went with a higher bid because I needed the BB to keep shooting well, shoot heavy with a lot of control, and be able to move into optimal firing positions so I can keep doing it.  This list has seen a lot of revision over the last couple of weeks.

JJs Juggernaught
390/400

1 • CR90a Corellian Corvette - Turbolaser Reroute Circuits (51)
2 • CR90a Corellian Corvette - Turbolaser Reroute Circuits (51)
3 • CR90a Corellian Corvette - Turbolaser Reroute Circuits (51)
4 • MC30c Scout Frigate - Lando Calrissian - Ordnance Experts - Assault Proton Torpedoes - Turbolaser Reroute Circuits - Foresight (97)
5 • Nebulon-B Escort Frigate - Mon Mothma - Salvation (94)
6 • A-wing Squadron (11)
7 • A-wing Squadron (11)
8 • Dash Rendar Outrider (24)

Another Rebel list here with an extremely high bid, but this list is basically the death by a thousand paper cuts that favor maneuverability and evasion.  Mon Mothma leads the charge here and the pumped out MC30c is expected to do a lot of heavy lifting and removal of bigger threats like the ISD.  I've played against this list before and its really scary.  It doesn't throw out a lot of dice, but there's a lot of guarantees via TRCs and speed to keep the kiting game going.

Gowtah
399/400

1 • CR90a Corellian Corvette - Turbolaser Reroute Circuits - Jaina's Light (53)
2 • Assault Frigate Mark II B - Electronic Countermeasures (79)
3 • MC80 Command Cruiser - Admiral Ackbar - Electronic Countermeasures - Home One (158)
4 • MC30c Scout Frigate - Turbolaser Reroute Circuits (76)
5 • A-wing Squadron (11)
6 • A-wing Squadron (11)
7 • A-wing Squadron (11)

This list epitomizes the mixed arms approach to Rebels with very light air cover.  The virtual no bid makes playing a list like this very unique.  It's just a nicely balanced lists with only the most crucial upgrades for the most part, and you're just looking at doing enough damage to shields so you can start peeling through hull.  Ackbar really allows a list like this to push in damage from afar, and once it gets closed the threat level increases with the MC30c and MC80.

***

Captain ICT reports:
As far as currently in Round 3.

R3 so far, Dodonna 1-0, Ackbar 4-1, Ozzel 1-1, Garm 1-1, Screed 0-1, Motti 0-1, Vader 0-1 (Reset not done then, yet)

Overall: Yes, Hero was correct: Vader falls from his 100%, he's still tied for the top commander, with General Dodonna who does another 100% this round to put him at 67%, both 2-1, where they will stay. Followed by Ackbar, then Garm. (61 and 57%) Ozzel remains at 50% while Screed, Mothma and Motti have all dropped games, and down to 43%, 29% and 44%.

R3 Squadron wise, All Squads are at 1-1, Heavy Squads at 1-1, Medium at 4-2, and Light at 1-3 (All ships haven't played yet, but should in a few minutes)

Overall: Squad Light is dropping a bit down to 59% winning, while Medium Squads have matched All Squads at 50%. Heavy squads are at 52%, and the no squads remain at 25%

Ship wise: In contrast to Round 2, Raiders are getting stomped... Badly! All 6 raiders so far have been on a losing side.  Others not doing well are the VSD1 (though that's only 1 so far) ISD2s at 25%, CR90(A)s at 29%, and Glads at 33%. Doing well are the MC30s with an 83% win rate so far, and the MC80s at 75%, followed by the Nebulon-Bs and AFM2s at 67%. Imperials appear to be getting stomped so far.

As of now: Best ship is the MC80 at 65%, followed by the Neb-B at 57% and Glad at 54%. Worst ship is the VSD at 27%. (Though there are a number of VSDs still waiting on R3.) Everything else is between 42% and 48%. (In increments of 2% CR90, AFM2, MC30/Raider, ISD)

Indeed, Rebels are stomping Imperials hard (and a few fellow rebels) in Round 3. The only Imperial victory has come in an Imperial on Imperial match. Rebels: 6-3 vs Imperials 1-4. Overall that brings us to a slight Rebel lead: 19-17 to 15-15


Rekkon vs Dab Darklighter is on Vassal now. Go watch the clash of styles, small fast ships and fighters, vs the might of the Empire's ships in a game of superior positions!

***

Overall, a very fun and solid tournament with a lot of different playstyles.  There was only one Fireball list and that person wasn't able to play the full amount of games.  I'm really curious on how this entire tournament would have been different if there was more Fireballs in the meta.  As you can see here, there's only one list that has a seriously strong squadron presence.

In case you guys didn't catch it, my games can be found here:
Game 1 vs. clontroper5
Game 2 vs. audere1882
Game 3 vs. Qark

The next one is supposed to be sometime early next year, so I can't wait to see how the meta evolves by then.  I think for sure we'll see more squadrons for sure.

Thursday, December 24, 2015

Armada: Ackbar and Mon Mothma's fleet

All dead.

Out of craziness, I've decided to swap out my MC80 for a couple of games so I can have fun with my MC30c.  One of the biggest problems that I've noticed in my playstyle is my general desire to do lots of damage and play with maneuverable ships at the same time.  This is probably just the Eldar player in me and one of the reasons I've basically included Engine Techs into all of my lists.  Also having played with TRC90s in every game since I entered the Vassal tournament a few weeks ago, I can't stop fielding it.  With that in mind, I got to thinking that I should try a few games without the MC80 but with Ackbar as a force multiplier in my fleet still.  The MKII is already a pretty fantastic ship and I figured why not, let's get more ships in there for the points and take the MC30c out of mothballs.

Behold, the interchangeable list that should work with both Ackbar and Mon Mothma depending on playstyle.  With the 8 points that you save with Mon over Ackbar, you can buy APTs on the Scout Frigate and just call it a day.

ACKACK
Author: HERO

Faction: Rebel Alliance
Points: 391/400
Commander: Admiral Ackbar

Assault Objective: Advanced Gunnery
Defense Objective: Fire Lanes
Navigation Objective: Dangerous Territory

[ flagship ] Assault Frigate Mark II B (72 points)
-  Admiral Ackbar  ( 38  points)
-  Raymus Antilles  ( 7  points)
-  Gunnery Team  ( 7  points)
-  Electronic Countermeasures  ( 7  points)
-  Heavy Turbolaser Turrets  ( 6  points)

MC30c Scout Frigate (69 points)
-  Foresight  ( 8  points)
-  Ordnance Experts  ( 4  points)
-  Turbolaser Reroute Circuits  ( 7  points)

CR90 Corvette A (44 points)
-  Turbolaser Reroute Circuits  ( 7  points)

CR90 Corvette A (44 points)
-  Turbolaser Reroute Circuits  ( 7  points)

4 YT-2400s ( 64 points)

The playstyle here changes drastically depending on who I have as my commander.  With so many Evades in the list, you can go purely defensive and just run a death by a thousand papercuts with Mon Mothma.  Her boardstate also makes Foresight basically unkillable in most cases, but the difficulty of the list drastically increases.  In order for you to capitalize on the most damage possible, you will need to run closer to the enemy, utilize those blue dice more readily, and perform multiple double-arc attacks to reach the same level of power that Ackbar offers.

Ackbar naturally benefits ships that can throw out red dice, and even more so for TRC90s.  Both the TRC90s and MC30c can throw out 4-5 dice from the side with CF, and firepower of this magnitude cannot be repelled so readily.  I actually chose to go with Raymus and HTTs over Intel/XI7s in this list because of a number of factors:  HTTs work better with Gunnery Teams since Intel Officer can only apply to one target a time.  HTTs also fit well in the theme that I'm applying damage that's spread out all over the place because almost for sure, my opponent will already be spending Redirects.  Since I don't have the accuracy bonus of Home One being applied to my ships, a lot of damage spread out will be more effective than one ship gunning for hull.  Not to mention that HTTs can apply its own form of control without dedicating an officer slot, so Raymus can do his business.  This involves activating all of the YTs with my psuedo squadron-4, getting the full benefit of CF, repairing with 6 points, and going from speed 3 to 1 with extra yaw.  Since the MKII is noticeably more fragile than the MC80, Raymus and HTTs will work better for me in this kind of list.

Let me know what you think, and remember that you can basically swap out commanders based on your playstyle.  You have 4 ships, a great bid, and autonomous YTs so you can spam those Concentrate Fires.  Have at it folks!

Random PSA from a game I just played: Take Leading Shots on your MC80.

No Brace either on his MC80.

Wednesday, December 23, 2015

Armada: Luxury upgrades

If you don't think you need it, you probably don't.

This is going to be another one of the posts that talk about upgrades for the most part, so get ready.  Remember that article I wrote a while back that talked about the basic upgrade principles?  Well, I want to expand on that a little bit because I've been using a few terms pretty frequently in my articles.

Well I don't like to use the term "mandatory" when it comes to list building, there's just some upgrades that are complete gold for a particular ship.  Around the same note, there's a few upgrades are are absolutely vital to your strategy as well.  So for the lack of a better word, yes, I'm referring to those upgrades that you absolutely cannot go without because you feel that they're integral on making your list work.  Before I get all worked up on trying to explain things too much, I'll just throw out an example using my own list.

My current Ackbar list has undergone a countless amount of games and have seen a tremendous amount of revision.

Here's the latest:
390
MC80C, Ackbar, Home One, Engine, Intel, XI7, Leading Shots, ECM
MKIIB, Gunnery Teams, ECM, XI7
CR90A, TRC
4x YT-2400

Let's take a look at the MC80 Command in this case as it's the most heavily upgraded.  Out of all these upgrades, which ones do I feel like it's a must for the ship and the strategy I'm trying to outline?  Well for one, Ackbar is the only true mandatory in there so let's not count him at all.  This leaves us with the rest of the upgrades named above, and I'll tell you first hand that most of them are there to execute my strategy.  For the actual ship itself, I think ECMs is the only mandatory upgrade.  What?! What about Engine Techs?  You wrote an entire article on why Engine Techs are a must-buy on the MC80!  Yes, while this is very true, I think Engine Techs are essential to my particular strategy.  I'm using the MC80 Command as a pure damage platform and in order for me to maximize on that, I need superior positioning so I can shoot from both side arcs.  Is it actually mandatory for the ship itself?  Not really.  That's because I lump ship-specific upgrades in the category that regardless of your strategy, you should have this upgrade.  ECM is the only one that fits here because no matter what your strategy is, you're still going to be taking damage from the likes of the ISD.

OK, that basically leaves us with Engine Techs, Intel Officer, XI7s and Leading Shots.  Home One is vital to my strategy on improving the rest of the fleet with accurate, powerful firepower.  That's why I have Ackbar in the MC80 in the first place, so that's our first mandatory upgrade that's strategy-centric.  Out of the rest of the upgrades, I would say that all of these are there to support my strategy of damage and control.  Since I'm building my MC80 to be a battleship, it needs to be able to deal a lot of damage.  This is why XI7 would be be the first upgrade I take after Home One and ECM, followed Engine Techs.  Why Engine Techs?  Because if you're not setting up good shots and getting good angles, you're pretty much playing with half a ship.  When it comes to Ackbar, you throw out a lot of dice but you're forced into only shooting from your side arcs.  It would be a huge shame if you had the opportunity to rake your opponent's fleet but you're unable to set it up.

Intel Officer and Leading Shots are actually luxury upgrades.  Intel is there to bully the Brace, but if they're already exhausted by say, a shot from your MKII and you roll an accuracy, you will get the same effect.  Leading Shots is purely luxury in the fact that you're looking to round out your damage output.  Since you're throwing more reds with Ackbar, it's important to make sure those blanks go away when you absolutely need your ship to do damage.  After all, if you're already taking the other upgrades to do damage, you might as well make sure that damage is consistent.  However, the one thing that really sticks out here is that I value both the Intel Officer and Leading Shots to be more important than the luxury upgrades I have on the other ships in my fleet.  If you want to carve out the points even further, I would definitely take Intel on MC80 over the XI7 because of the larger damage capacity and the fact that the MC80 itself doesn't get Home One's accuracy bonus.  Furthermore, I would take Leading Shots over the Tantive IV because my strategy is to push as much damage out as possible.

When it comes to looking at the rest of the list, the upgrades I have on them is what I would considering mandatory to my strategy.  They're pretty much barebones now, free of all upgrades I would consider to be luxury.  TRCs drastically improve the damage potential of my CR90 and XI7s do the same on the MKII.  Gunnery Teams are there to give me the firepower of another ship if I'm planning to play the like a congo-line.  Intel has been pulled due to its redundancy under Home One, and no other upgrades are needed on the MKII.  The Tantive IV or Jaina's Light titles are also missing because they are also what I consider luxury items.  Those titles are good to have, but not needed in the grand scheme of things in which I'm looking to do big damage with a huge bid to go first.  Can I fit a Tantive IV in there?  Sure, but am I willing the 393 bid vs. the 390 in a serious event?  Probably not.

In summary, my best advice when it comes to min-maxing your list is to evaluate your lists in this order:  Look at mandatory upgrades first, the upgrades that are most effective with your ships and support the strategy that you're going for.  Cut everything else.  Then look at your current upgrades on all your ships and see if you have any redundancy, or you don't feel like you really need.  Those are then considered new luxury items, and fit within the category of "nice to have, but not vital".  Cut those as well.  Now, rinse and repeat a few times until you feel like you're in a good place and then playtest enough that you start questioning the list again.  Then the cycle starts anew.

Tuesday, December 22, 2015

Armada: Command dial strategy

Choosing the right commands can mean victory or defeat.

One of the less talked about things about Armada for some reason is how you go about setting your command dials.  I see a lot of topics talking about commander choice, fleet design and what upgrades to take, but I generally don't see commands being talked about all that much.  This is a big mistake that I think I'll be addressing in today's article.

When I think about command dials I think about turns in the game.  It's basically a timeline that you can control about where your ships will be and what they will be doing on that particular turn in the game.  This might not be what everyone is thinking, but it's what I'm thinking when the game starts out.  After the deployment is done, I look around the table and choreograph a general idea of where I want to be, try to anticipate what my opponent will be doing, and seeing if the battlefield conditions play out the way I think it will.  Most of the skill in Armada comes in how well you can accurately react to battlefield conditions, and also how you go about planning of them just in case things go wrong.  Sure, you can always compensate for a misplaced command dial and take a token, but most of the time the dial will always be stronger.  That's why you want to maximize on the effect from the dial as much as you can.

Another way I look at commands coincides with my strategy.  Keep in mind that strategy is very different than tactics because strategy typically refers to what you want to accomplish rather than how.  If my list is designed to be squadron heavy, and that the squadrons will need to be issued commands to be effective, I will put that into my gameplan when determining what command dials to set.  If my list calls for flying forward very aggressively and entering a damage-race with my opponent, I will probably queue up multiple Concentrate Fires.  On the completely other side, if I'm going to be flying broadsides and trying to escape my enemy, I will probably look for more nav or engineering commands so I can keep doing what I'm doing without taking too much dmage.  I think that overall, your strategy will dictate your initial dials while everything after, is purely reactionary.  All of this needs to be considered as well as the overall timeline of the match.  Never lose sight to the fact that with each dial you set, you are making the conscious decision that happens during one of the 6 turns of the game.  You only have 6 dials to set in the course of the game, so keep that in mind.

Let's take a look at a imaginary battle scenario.  The order I use to analyze the components on the table are as follows:
  • What list does he have and what components are in it? (his list)
  • What does the map look like? (ship deployment, obstacle layout)
  • What is the mission? (what objective, who is first player)
  • What do you think his strategy will be? (an educated guess)

Let's say that he has a Motti ISD-II list with 2x Raiders and a Fireball.  His ISD-II is gearerd for combat with Gunnery Teams, XI7s and ECMs, his Raider-Is have Ordnance Experts and he's fielding the cookie cutter Vader, Dengar, Rhymer and 4x Firesprays.  You look to see the final ship deployment, where the squadrons are located on the map, and where the obstacles have been placed.  This should be pretty self-explanatory because you helped place some of those obstacles and you hopefully have deployed in a manner that will keep you battle effective against his list.  Let's just say you also have first player so you choose to mitigate his battle advantage with a mission that's not too detrimental to your gameplan.  For the sake of this practice scenario, let's say that you have first player and chose to play Contested Outpost while keeping the outpost clear of as many obstacles as possible.  Your opponent chooses to park the majority of his choices at the outpost and he set his ISD-II at speed-1.  This should immediately set off some red flags that he's looking to play at speeds 1-2 at max, looking to get as much as he can from that outpost as possible.  You also note his Raiders that are flying flanks on his ISD, but speed-2 suggest that he might be looking for your movement first and flying escort for his Fireball which is sandwiched between the ISD and the far left Raider.

Great, so hopefully you have an idea how you want to execute on this game and now it's time to get those dials down.  It goes without saying that the intial dials you set on your command-3 ships will be turns 1-3, and what you want to do next is reflected in your playstyle, strategy and list.  To make it easy, I'll take you through what I would do with my MC80, MKII, TRC90 and 4x YT-2400s list.
  • TRC90 will activate first, navs for token at speed-2, I want to see what my opponent activates and does first, see his positioning, and will probably queue for CFs all the way through.
  • MKII will activate next, dials will be set to nav, engineering, concentrate fire, and I want to bank the first 2 tokens while being able to set up at speed-2.  I will then queue for Repair on the 4th, and depending on damage intake cycle between Repair and CF once battle is joined on turns 5,6.
  • MC80 will activate last at speed-2, sets up nav, squadron, nav, and I want to bank the first nav, catapult my YTs into the fight, nav again to set up a better shot, while keeping the nav token close so I can Engine Techs out of trouble if the situation arises.  On subsequent turns, I'm looking to spam repairs because I know the MC80 will be the primary target.

Here, you can see that my dials are set with tons of stuff in mind.  This includes activation order, my plan to gauge what my opponent is doing, my strategy to let the YTs do their job while I setup and get into optimal firing position.  I also plan for tokens, and whether or not I have Engine Techs, and think about the speed at which I'm going in relation to his.  Since I expecting battle at round 2-3 depending on his speed and the MC80 to be taking the beating, I'm trying to keep him flexible (nav token to ET if needed) while letting my MKII throw as much damage as possible.  Once I slingshot those YTs into position, I'm going to be looking at them to do their own thing while my ships can concentrate on the greater battle.  While you should plan for turn 4, there's just no way you can see any further than that because too many things can change during this time.  That's why the first batch of dials you set for turns 1-3 on command-3 ships are reflective of your strategy in relation to your opponent's strategy, turn 4 is where you think the state of the board will be once those strategies have been executed, and 5-6 is purely reactionary with a slice of guesswork.  The guesswork is primarily based on how fast or slow damage is coming in what where your ships are located.  Only time and dice can really tell there.

Alright, I think that's that's all I got for now about command dials and the strategy behind them.  I hope it has been helpful.

Monday, December 21, 2015

Armada: The Fireball Menace

Seriously though, F this guy.

Vader
Dengar
Rhymer
4x Firesprays 

This is what the vaulted Fireball looks like and something you need to prepare yourself for.

Stats that you should care about:
  • 8 blue bomber dice, 1 black bomber dice, 2 black anti-ship dice, and Vader's natural damage amplifier
  • 19 blue dice AS, 2 black AS from Rhymer and Vader, and Vader's natural damage amplifier
  • Threat range of 3 + Medium Range from Rhymer, which translates to almost speed-5 threat range
  • 38 total hull points, 5 braces and 1 scatter
  • Rogue on all the Firesprays
  • Dengar is the best Intel platform in the game due to his speed and durability
  • Vader provides dedicated AS and Escort
  • Rhymer amplifies the threat range of all squadron's anti-ship dramatically

Saying that the Empire Strikes Back is a huge understatement when fighting against the new Fireball.  The amount of hull points, versatility, immunity to squadron commands, threat range, and damage potential is absolutely insane.  I think all this power stems from the fact that Rhymer offers unmatched threat range, Dengar allowing free movement, and that Firesprays might have one keywords too many.  Rhymer was never an issue in Wave 1 due to the lack of Intel, but once Dengar and the Firesprays hit the meta everything went out of wack.  Now, I'm not saying that this combination is unbeatable, it's just really difficult to handle.  The Fireball gives me an extremely difficult game every time, and it's pretty much point and click with very little downsides.  This is due to it being a snowball of different abilities and synergies all coming together that makes this combo so difficult to handle.  Vader can do insane amounts of damage to squadrons and has Escort to tie down squadrons from killing Dengar, who in turn can jump around at will and loosen up other squadrons that's trying to tie down the Firesprays, who themselves have Rogue and can do a ton of to all targets.  When I first read Rhymer I already thought he was a beast, but at least he could be chained to a rock if he was tied down.  Dengar just had to break everything, didn't he?

Just look at the threat range of this damn thing.

I think this inclusion is going to be one of the biggest threats to the Wave 2 meta.  Sooner or later, everyone will experience it, and if you don't, you're clearly not playing in tournaments.  For big ship lists, or lists running very few fighters, there's going to be nothing from stopping this list from rolling you over.  For everyone who has ever said: Just ignore the Fireball, kill the rest of his ships, I think you vastly underestimate the amount of damage 9 bomber dice and 2 black ant-ship can do to your ships that has a threat range of speed-4.5.  This is not to mention the ISD and Raiders on the other side of the table, with hopefully Motti taking it easy while throwing squadron commands and watching your ships burn from his ISD-II.  In actuality, the Fireball is more maneuverable and hits harder than any capital ship in the game, and shrug off light fighter cover like it's nothing.  It's for this reason that I'm no longer looking at 2 A-Wing builds, or even Tycho and 3 A-Wings as the bare minimum, but looking at 6+ squadrons in order to face this new threat with greater confidence and reliability.  Dengar simply has to be killed or else he's going to let loose his dogs onto your ships and there's very little you can do about it.  Like I said before, every game I've played against a Fireball, I feel like I'm exerting significantly more effort in trying to keep my ships alive, having to execute precision movement with my A-Wings, and making sure they're tying down the right targets, baiting Dengar into sub optimal locations, when all the other player has to worry about is the order in which he should activate this Rogue squadrons.  It's a bad feeling and testament to the threat level of this meta-changer.

Force Dengar into awkward positions with good A-Wing placement.

Wave 2 did a lot of things and opened up a lot of new strategies.  However, I think the paradigm has shifted dramatically when it comes to squadron warfare and ship warfare.  All of a sudden, you have Ackbar and TRC90s putting out so much damage from long-range that Imperial players are caught reeling.  At the same time, you have a self-sufficient super squadron like the Fireball that makes command-reliant Rebel squadrons look like a complete joke.  I'm currently developing solutions to the Fireball "problem", but I think Imperials have a much better time dealing with the Fireball than Rebels.  Part of it is the command-efficiency that Imperials will naturally gain if the Rebel player is taking a good amount of squadrons himself, but the other part comes from the fact that I don't think 2/4 A-Wings is enough these days.  After all, just how long do you think the A-Wings in the above picture can last underneath all that hull and firepower?  Once a few A-Wings die, Dengar will free the Fireball so it can start wreaking godlike damage onto your ships.  It becomes less of a how long can you tie up the Fireball and more of a Dengar must be killed.  You simply cannot outrace the damage done from a list running this combo and expect to come out on top.  At least Imperial players have access to unmatched anti-squadron dice with Howlrunner and Interceptors, and they have an amazing flak platform from cheap 2-black Raiders with Ordnance Experts.

Is it powerful?  Hell yes.  Is it absolutely unstoppable?  No way.  I think with the right list and composition, you can fight this threat off or at least deter it from engaging the rest of your fleet.  Go play some games vs. it and let's think about how to kill it together.

Sunday, December 20, 2015

Armada: Rebel Commanders

Definitely not talking about climate change.

In this article, I'll be taking a look at the Rebel commanders to analyze their strengths and weaknesses.  I will also cover their typical fleet archetypes as well as the general strategy needed to play and play against these particular commanders.  Just like the Imperial commander's post, this one will be speaking specifically from a Wave 2 standpoint.

Seriously, what is up with those robes?

Mon Mothma

When you think about Mon Mothma, you think about Evades.  When you think about Evades, you think about ships that can take multiple Evades.  Mon Mothma is basically the commander you want to take if you want to take a long-range fleet that can kite you from far away, plinking away at your shields and forcing you to spend defense tokens, before closing in for the killing blow.  That's why when you look at most fleets with Mon as their admiral, you see loads of CR90s, Assault Frigates and MC30cs.  All of these ships benefit immensely from having Mon as their admiral because her ability basically makes Evades effective through all range bands, with their biggest boon of outright negating dice also being effective in close range.  This is huge because a lot of the ships that she likes to field doesn't have a lot of hit points, and getting the most out of evade tokens is the only way the fleet stays alive.  Good thing that for ships like the CR90 and MC30c, you have redundant Evades which makes them very strong against Accuracy dice.  With TRC90s being a big thing now, and MC30cs having incredible potency in close-range fights, Mon Mothma has become very powerful in Wave 2.  Her only vulnerbility is the ships that she likes having in her fleet.  Sure, the TRC90s might do a good amount of damage, but they can die to a swift breeze if the dice go wild.  Such is the price of playing a super high-skill cap commander.

I heard you like tokens.

Garm Bel Iblis

This commander is all about token effeciency.  Not only does he give your fleet an immediate boost out the gate because he loads all your ships up with tokens, but he does it again at the start of the fifth round too.  This makes him extremely powerful on ships with higher command values since he can get the most bang for your buck that way.  The extra tokens also makes him really powerful when fielding squadrons, because the extra squadron token allows you to activate an extra fighter.  Most of the time, I see him in fleets that have the MC80 or MKII, but also Nebulons because of their solid synergy with squadrons.  I would say that overall, he doesn't really have any tricks or gimmicks in how to make him work.  Just have enough ships that can benefit from all the tokens he'll provide and you'll be good to go.  The more ships you can keep alive with these tokens, the more you will benefit even more when the fifth round hits and you get them all again.  While the Imperial commander Tarkin trickles in tokens and is more reactionary, Garm is very bursty in the bonus that he provides.  When it comes to tokens, it's almost never a bad thing to hold onto them for when you need them.  This frees up your dials to take whatever action you want so you can benefit fully from having both the dial and token for when you need it most.  Overall, Garm is pretty much the swiss army knife of the Rebel forces as he gives a little bonus to just about everything.

You get a crit.. and you get a crit!

General Dodonna

General Dodonna is all about inflicting crits and picking the critical effect.  For this reason, he's the biggest fan of having ships that can deliver crit effects onto the enemy fleet.  Black dice ships like the MC30c absolutely love him, and with Assault Proton Torpedoes, you can pretty much guarantee what kind of effect you can place on the enemy ship.  This can potentially be a game-changing Projectors Misaligned or even Structural Damage if you're looking to fish out that last bit of damage.  For this reason, Dodonna enjoy any ship that can push through solid damage.  The MC80 stands out above the rest because it can throw a good amount of dice, but the MC30c with its black dice, ability to take TRCs and APTs really makes it stand out above the rest.  On other ships, XX-9 Turbolasers stand out like a sore thumb because you can really start piling on crits.  At this point, you might as well run with Precision Strike as one of your objectives and bring a full flight of bomber squadrons to keep the crit train rolling full steam.  Despite all the play centered around inflicting crits onto enemy ships, you are digging randomly and you might not always get what you need in that particular instance.  This can make Dodonna one of those more fun if gimmicky admirals to play.

Unleash the Kraken!

Admiral Ackbar

There's probably no other admiral in all of Wave 2 that shook up the meta more than this one.  Admiral Ackbar is the commander that put Rebel firepower on the face of the map.  For the first time in Armada history, Imperial players have to be wary about the ridiculous amount of firepower that can come spewing out of Rebel anti-ship lists.  You will almost always see MC80s and MKIIs in a list with Ackbar as his flagship, but you will also see TRC90s and MC30cs as well because of their increased damage potential.  In short, Ackbar is one of the most straight forward admirals in the entire game.  There's not much you can say about two extra red dice on every attack out of the side arcs, it's more like one of those things you have to learn to accept.  Just keep in mind that if someone chooses to use Ackbar's ability, they are locked in shooting from the port and starboard arcs.  This is Ackbar's primary weakness and something that players should exploit in a hurry.  Admiral Ackbar is currently the most expensive Rebel commander in the game and for good reason.  He single-handily turns up the firepower of the entire fleet from decent to severe, and is now a permanent threat to every single list in the game.

The Walking Dead, but flying, in space.

General Rieekan

While Ackbar is pretty straight forward with how he plays, Rieekan will just confuse you.  A lot of people have been calling this guy the zombie commander and that's perfectly valid.  Rieekan basically allows you to keep a ship or named squadron alive until the end of the Status Phase.  This essentially means that no matter what you do to try and destroy that ship, it's going to be shooting at you no matter what.  This basically nullifies the first player advantage most of the time as you simply cannot land a killing blow.  In some cases, this can also be a huge detriment to the player who is going first, as you risk overrunning your position and exposing your rear arc to enemy fire.  Without saying, you almost always want to take a few named squadrons with Rieekan and load up on ships that might otherwise die painfully.  I'm talking about ships like the MC30c, the CR90 or virtually any other ship that you don't mind losing as long as you can get your shots in.  While some players are looking at this commander with disdain, other players are exploiting the fact that Rieekan changes how players play the game.  When Rieekan is on the table, things can get really tricky really quick as your normal order of operations go out the window and the strategy you were intiially going to excute falls apart instantly.  I can't wait to see what kind of shenanigans this guy can pull off.

That's all folks.  I hope you enjoyed this commander series.

Saturday, December 19, 2015

Armada: Imperial Commanders

Join me, or die.

In this article, I'll talk about the commanders available to the Imperial Navy in Star Wars Armada.  Since this is going to be a Wave 2 article, I'll talk about these commanders fit into the current meta, what they offer to the fleet, and some common fleet archetypes that go well with the commanders themselves.  Don't fret Rebel admirals, I'll be doing a follow-up for the Rebel Alliance very soon.


You can practically see the force choke.

Admiral Motti

In my opinion, Admiral Motti is the most cut and dry commander that the Empire has.  If you're rocking a small boat, you get 1 additional hull, if medium, you get 2, and if you're packing the ISD, you get 3 additional hull to the ship itself.  This is immediately a force multiplier if you're taking the bigger ships because the benefit is much more dramatic.  The more big ships you have, the more pressure you can put on your opponent and the more aggressive you can be in your fleet tactics.  This is why most of the ship archetypes more or less center themselves around double ISD builds because you will get the most benefit.  I've also seen brutal push-type lists with triple ISD-Is with a few upgrades throwing 45 hull points in your face and essentially running you off the table.  I think overall Motti is a very solid commander for the points you pay for him, and he is almost essential if you're planning to take a 2-ship list because you're running a Fireball.  If you absolutely need your ships to survive and don't need any more tricks, Motti is very reliable.  Just remember that if he is lost (as in his flagship is destroyed), you will immediately lose all your health benefits and your already heavily damaged ships might explode along side him.

SCREEEEEEEED!!!

Admiral Screed

For the longest time, Screed has dominated the Imperial tournament scene.  His ability like many others is fleet-wide, is very consistent, and can guarantee critical effects to trigger.  Simply roll some dice and if you get a blank, just cancel it to turn another dice into a crit.  It's probably no surprise that he runs most frequently in lists featuring black dice because you will be able to maximize your damage output with the hit/crit result as well as triggering any critical effects that you may have.  With Wave 2 coming in hot, Assault Proton Torpedoes are one of the best ordnance upgrades you can take.  You can essentially put a face-up damage card on any target that's afflicted, bypassing most common defenses and just giving your opponents a bad day once the face-up cards start piling up.  Overload Pulse is another upgrade that's practically guaranteed with Screed, and having a target's defense tokens flipping to exhausted right before Avenger shoots can be absolutely devastating.  Assault Concussion Missiles is still an amazing way to do massive amounts of damage and weakening the effects of Redirect, and you'll commonly see this deployed on Gladiators and Raiders as a delivery package.  Screed likes to play with black dice so you'll almost always see a Gladiator with the Demolisher title in his fleet.  Raiders are also excellent torpedo frigates with the APT upgrade.  While Screed himself might be just fine in an ISD-II or I if you're feeling ballsy, it's the rest of the fleet that can throw ordnance that really makes him stand out.

The man, the legend, the Tarkin.

Grand Moff Tarkin

Tarkin is simply amazing for the amount of versatility he can offer the fleet, but he's also very expensive.  At 38 points, he's the big daddy of the Imperial commanders and for good reason.  He has amazing synergy with virtually every fleet archetype and his ability to grant free tokens to the entire fleet makes him one of the most command-effecient upgrade in the entire game.  For fleets that like to utilize Raiders, you can easily grant nav tokens and use them in conjunction with the dial to change from speed 2 to 4 or vice versa.  For fleets with big engineering numbers, a token is the difference between an extra shield regnerated or having two damage cards repaired per turn.  And honestly, who doesn't like free re-rolls granted to you by Tarkin's CF tokens when you're in the heat of battle?  Tarkin's synergy is even more apparent when you have upgrades like Engine Techs or Wulff Yularen.  You can trigger the tokens instead of dedicating command dials to activate certain abilities, or just have them recycled indefinitely with Wulff.  While Tarkin is expensive, he offers unmatched effeciency to the entire fleet in terms of command management.  You can easily Concentrate Fire with the dial and have CF tokens instantely granted to you, as well as repairing at above average rates when you need it most.  This amount of flexibility allows you to stack tokens on your entire fleet in the earlier phases of the game where engagement is slow, and the same flexibility allows you to react to battlefield conditions as you play on.  This is why Tarkin is the most expensive Imperial commander, and one of the reasons newer and veteran players enjoy him most.

Pure offense, how Sith-like.

Darth Vader

Darth Vader is one of those commanders that grants a huge damage buff across the entire fleet.  He is most seen in lists with redundant defense tokens such as ISD and Raiders, but you will also see him with virtually any and all ships.  The ability to re-roll everything is like a fleet-wide Leading Shots upgrade, but you don't need to spend your own dice to do it.  You simply flip one of your defense tokens and you're re-rolling anything that you want.  This pretty much means that Vader is one of those commanders that's more like an upgrade for the entire fleet rather than a commander that adheres to a specific playstyle.  Vader enjoys ships that throw a good amount of dice since his effect will be best put to use there.  However, this can also benefit ships that throw out less dice like Raiders since all you really want to do is garuanatee some hits on dice that might not be as consistent.  That means that you typically want to build around red and black dice ships instead of the blue because the former is more prone to bad rolls.  This means you can also cut out all Ordnance Expert and Leading Shots upgrades from the rest of the fleet because you're not committed on exchanging defense tokens for global re-rolls.  That's pretty solid.  Overall, I think Vader will be less played than the other commanders because of the nature of the commander himself.  He pretty much does what other re-roll mechanics already do, but he does it across the entire fleet at a preminum.  What if you don't need these re-rolls on every ship?  What if you just want to buy one set of Leading Shots or Ordnance Experts, or that your ship will be better off just holding onto CF tokens?  For fleets that don't really need the re-rolls, Vader is probably better off flying around in this TIE Advanced.

The sleeper admiral has awakened.

Admiral Ozzel

Last, but certainly not least, we have Admiral Ozzel.  The name of the game when it comes to Ozzel is speed and speed manipulation.  Navigate is arguably the strongest command in the entire game because it allows the player to set up the board to his advantage.  If your ships can't shoot, or be in position to shoot and shoot well, then they're just decorations on the table.  Ozzel takes that to the next level because he adds unpredictability to the Navigate command, and this includes dials and tokens alike.  Being able to jump from 2-4 on a Raider or going from 1-3, followed by Engine Techs on a Gladiator is huge.  Likewise, being able to slow from 4-2 for a breakneck right-angle turn to get into an optimal firing position next round is fantastic.  Even the ISD, who can skid around at max range to reduce the amount of return fire that's being directed towards it can suddenly jump to speed-3 and cut off a Rebel escape.  The amount of movement mechanics you can apply with Ozzel is absolutely fantastic if you're planning to take a list with large jumps in speed.  Ideally, the more variations you have in speed, the better Ozzel will work out for you because you will be able to burst into action or slow down according to battlefield conditions.  There's been so many times that charging forwards might seem like a great idea next round, but an unexpected navigate command from my opponent changed it all for me.  Now imagine the same scenario where you can suddenly slow to 1 from 3 with just one nav token, and still being able to repair or concentrate fire on the dial itself.  It's for this reason that Ozzel been seeing more and more play with Imperial players prefer superior positioning and ambush tactics in their playstyle.  The incredible pricetag of only 20 points makes him the cheapest Imperial commander so far, which seems like a steal considering what he offers to the entire fleet.

Alright guys, that's all for me for now.  Stay tuned for the Rebels version!

Friday, December 18, 2015

Armada: Vassal Tournament - Game 3

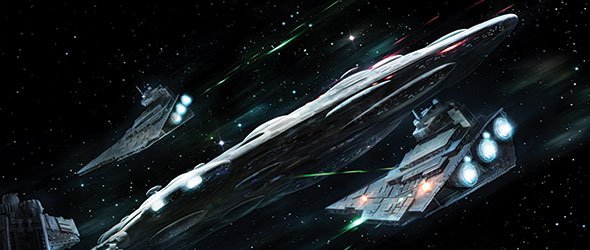
This picture couldn't have been more accurate.

Holiday Vassal Tournament - Game 3
Objective: Dangerous Territory

HERO
Faction: Rebel Alliance
Points: 391/400
Commander: Admiral Ackbar

[ flagship ] MC80 Command Cruiser (106 points)
-  Admiral Ackbar  ( 38  points)
-  Home One  ( 7  points)
-  Intel Officer  ( 7  points)
-  Engine Techs  ( 8  points)
-  Electronic Countermeasures  ( 7  points)
-  XI7 Turbolasers  ( 6  points)
-  Leading Shots  ( 4  points)

Assault Frigate Mark II B (72 points)
-  Intel Officer  ( 7  points)
-  Gunnery Team  ( 7  points)
-  Electronic Countermeasures  ( 7  points)
-  XI7 Turbolasers  ( 6  points)

CR90 Corvette A (44 points)
-  Jaina's Light  ( 2  points)
-  Turbolaser Reroute Circuits  ( 7  points)

1 Dash Rendar ( 24 points)
2 YT-2400s ( 32 points)

Vs.

Qark
Faction: Galactic Empire
Points: 393/400
Commander: Darth Vader

[ flagship ] Imperial II-Class Star Destroyer (120 points)
-  Darth Vader  ( 36  points)
-  Relentless  ( 3  points)
-  Gunnery Team  ( 7  points)
-  Electronic Countermeasures  ( 7  points)
-  XI7 Turbolasers  ( 6  points)
-  SW 7 Ion Batteries  ( 5  points)

Gladiator I-Class Star Destroyer (56 points)
-  Demolisher  ( 10  points)
-  Intel Officer  ( 7  points)
-  Ordnance Experts  ( 4  points)
-  Engine Techs  ( 8  points)
-  Assault Concussion Missiles  ( 7  points)

Gladiator I-Class Star Destroyer (56 points)
-  Insidious  ( 3  points)
-  Intel Officer  ( 7  points)
-  Ordnance Experts  ( 4  points)
-  Engine Techs  ( 8  points)
-  Assault Concussion Missiles  ( 7  points)

4 TIE Fighter Squadrons ( 32 points)


Pre-game thoughts:
Alright, let's see.  His list has an ISD with double GSDs with ACMs and Vader as his commander.  This means that he's probably running an aggressive push list so I'm expecting his strategy to be to run towards me, possibly cut me off, and then slam into me with everything he has.  The biggest weakness on my MC80 is if he's blocked off and he's just taking a constant pounding in the face with no way to maneuver out of there.  Thus, my gameplan was to spam as many navigates as possible and setup angles where I can keep as many of his ships within arc and utilize my wide MC80 arcs and my MKII's Gunnery Teams as much as possible.  I already know he's going to be aggressive in his list, but I also know that I have first player so I'll be able to shoot first which will be critical in a Gladiator-heavy match-up.  If he had first player in this instance, I would have to play the long kiting game and hopefully down a ship before I can risk more aggressive action.  Since he doesn't, I think that as long as I'm able to pepper shots in the Gladiators while keeping my distance out of black range, I should be OK.  GSDs don't have a lot of HP so a solid shot from the MC80 should be enough to drop one if he's already damaged.

Deployment - I deploy pretty aggressively; looking for slash angles.

Deployment looks like this, which to my surprise, he didn't try to overpower one side but instead kept his forces relatively separated.  I think this works in my favor because I think he's eyeing those objective tokens rather hard.  Maybe too hard.  This is the break that I needed because he's giving me more space to maneuver and my ships can easily displace into better firing angles if he's going to try a wide flank.  Let's find out.

End of 1 - Once again, looking for that optimal firing angle.

OK, so my opponent goes for the wider flank from his leftmost GSD while his ISD moves forward very aggressively.  He's definitely looking to block with his ISD-II, but the way I positioned my MC80 puts him into a very aggressive slash position onto his ISD and GSD next turn if he tries to turn in.  At this point, he has to either commit with the GSD towards my MC80 or run away, both of which I find acceptable.  We both move up to claim some tokens, and the MKII moves into an angle to get the side shot next turn.  Dash and the rogues engage and I throw some blacks onto his ships before one-shotting a TIE Fighter.

End of 2 - I'm able to execute multiple slashes with multiple ships from here.

This is a big turn for me because I activate my Home One first and move into slash position of the ISD and his incoming GSD.  Since I'm out of black range and that particular GSD did not have Demolisher, I felt very comfortable in this position I'm in.  I also knew I was going to escape his ISD's forward arc next turn with some fancy flying from my navigates.  The MKII was in a pickle though, he fired off his side shots at both GSDs and had a really bold choice ahead of him:  Slow to 1 and angle hard to avoid the MC80's collision, or just go hard into slash of the ISD-II and hope I survive.  I count my tokens, my ECM was up, and I had a decent amount of shields to take a pounding if the ISD rolls 8-10 damage.  His Demolisher, who already has damage on him from the MKII, rolls up behind my MKII and does solid damage to it, procing the ACMs and putting a card on the MKII.  Jaina's Light activates next, shoots 6 damage into the back of his Demolisher and it goes down after I accuracy the Brace.  Finally, his ISD activates and puts some more damage on the MKII, clearing my right shields after Brace.  Next, his Gunnery Teams shoots at my MC80; putting front shields down to 1 after Brace and Redirects.  Meanwhile, the fighters slap eachother in the face in their side game.

End of 3 - Damage overwhelming, the death of both GSDs.

On this turn, I start with the MC80 and blow away the GSD to my starboard side.  Since he already took damage and Redirected damage, I just went into the starboard hull zone and it was enough to instantly take the ship down.  My port-side shot rakes the ISD-II and I force him to discard his Brace with Intel Officer.  I then cruise out of the front arc of his ISD while angling in a way that he won't be able to run from me next turn.  Sure enough his ISD activates, shoots the MKII again but didn't roll too hot, I Brace and Redirect and pull 3 cards.  His ISD turns, gives me his rear, and I shoot return fire with the Jaina's Light, shooting through my MKII but not caring for obstructions, doing 4 hits with an accuracy to lock down a green Redirect.  He burns one of his remaining ones, gets his shields stripped, just in time for my MKII to activate and go to town on dat ass.  I do solid damage, he takes more cards and we move onto next round.  His one TIE heroically ties up Dash until the end, so he was only able to make his rogue move.

At the start of 4, my MC80 activates and blows away Vader in the ISD, shooting full Ackbar into the rear arc.  GG Qark, 430-30 MoV, 10-0 win for the Rebels.

Post-game thoughts:
I think for this game in particular, my opponent might have lost on his initial deployment and during the first movement.  He went a little too hard for the early game tokens and should have moved directly towards me with everything he had in a more aggressive fashion.  Instead, he swung in wider arcs which played to my MC80's advantage, and I was able to setup multiple slash angles with both the Home One and MKII.  Once I was in position to do threaten multiple arcs, he had to either commit or run away, but either way he would have bled damage or not be in the fight.  We discussed the game afterwards and he agreed that the deployment could have been tighter, his flying could have been more aggressive, and he should have looked to block the MC80's path with the leftmost GSD and rightmost Assault Frigate with the Demolisher.  If they were able to block my escape paths, I don't think my ships would have survived firepower of that magnitude.  At that point, the game becomes a math problem more so than maneuvering.  I also knew that because my MC80 was geared as a battleship, I will be able to force the discard on the Brace in the initial exchange, which will for sure seal the fate of the ISD in subsequent turns.

Thanks for reading!

Thursday, December 17, 2015

Armada: The CR90 is great support

Lego support ship running for its life!

Having experimented with just having one CR90 in my Rebel list in the last couple of weeks, I have to say that it's changed me.  I'm not talking about just the raw damage potential that can come out of a little CR90 with TRCs equipped, I'm talking about the amount of flexibility it can provide for the rest of the fleet.  For example, the one that I have in Vassal tournament is sporting the Jaina's Light title and nothing else.  Having played with the Tantive IV variant in the last couple of days, I'm regretting taking Jaina's Light in my current tournament list.  This is not saying that Jaina's Light is not good, it's just saying that I think the Tantive IV is better overall for my fleet.

Check out the things you can do with the CR90 outside of TRCs:
  • Jaina's Light - Allows you to shoot through your massive MC80, get the obstructed bonus from enemy attacks, while not being obstructed yourself when you shoot.  You can also run around all day and land on asteroids, claiming objectives, or getting into better position to shoot the enemy ships from more vulnerable arcs.
  • Tantive IV - Allows you to gear up your ships in the beginning so you can fight the longer battle.  If the CR90 is going to be out of range of most things in the beginning, why not throw an engineering token on the MC80 so when you do repair, he can potentially heal up to 3 shields instantly?  Or why not throw a nav token on it so it can Concentrate Fire and trigger Engine Techs on the same turn?  In the first 1-2 turns where the CR90 is still moving around and positioning for shots, there's no better time to stock up on tokens that will really matter.
  • Leia Organa - Another great upgrade that basically allows you to change one of your ship's dials to the CR90s while still holding onto the dial itself.  A lot of things can change during the course of the battle and being able to instantly change a dial for 3 points cannot be underestimated.  For example, if you have a repair queued but would rather navigate to full effect, Leia can actually make that happen.  There's almost no other ability in the game that is quite like this, and even if you activated the CR90 last, you can still change the outcome of a ship's next unrevealed dial.

Now that the basics are out of the way, let's dig a little more:
  • Tantive IV + Leia Organa - This is a great little support ship if you can afford the 6 points in the fleet.  It's also probably the most reactive combo in the game because with your command-1 ship, you can have Leia turn the MC80's dial into Engineering on reveal, turn its own dial into a token, and then throw the token onto the MC80 as well.  Next turn, you activate and have 6 engineering points to spend on your big ship.  I would certinatly do this if your opponent's damage spikes all of a sudden and you were not prepared for it.  It can seriously mean the difference between living and dying next turn.  On the opposite side of the spectrum, you can always use the same combo to push out extra damage with Concentrate Fire if you need to seal the deal next turn.
  • Tantive IV + Raymus Antilles - Would you like a token generator for two ships on your fleet?  Raymus basically allows you to do this because he generates a token to get thrown onto one ship, and then you can bank the dial for another token that you can throw on another.  This is great with ships using stuff like Engine Techs or has high enough engineering values where having that extra repair has a noticeable result on the battle.  Concentrate Fire tokens are also great tokens to have if you're throwing a good amount of red dice.  Either way, you can choose to just use the dial for yourself and throw out Raymus' extra token to another ship if you so desire.  That is the benefit of having this particular combo.

I think that going forward, I will be replacing the Jaina's Light with the Tantive IV as my default title.  I've fallen absolutely in love with the ability to power Engine Techs without dedicating a command and having a stronger Engineering value for when the dice starts flying.  Having the extra re-roll from CF tokens are also nice, but keeping your MC80 moving with techs while repairing with 6 points is just too good.

Wednesday, December 16, 2015

Armada: Home One and TRC90s

I am going to officially coin the term TRC90.

I've been experimenting with various hybrid lists featuring Ackbar in the last couple of weeks all all my tests have been pretty successful.  Here is what I have tried in the last month or so, playing mostly Rebels and have been gathering tons and tons of experience with:
  • Home One, 2x MKIIs, full control, no air cover
  • Home One, 2x MKIIs, no Intels on MKIIs, light air cover with 3 A-Wings
  • Home One, Defiance, medium air cover with 6 A-Wings
  • Home One, MKII, heavy air cover with Rebel Aces/A-Wings
  • Independence, MKII, heavy air cover with B-Wings
  • Home One, MKII, CR90 with TRC, light air cover with 4 A-Wings (current favorite)
  • and lastly, Home One, 3x CR90s with TRCs (or TRC90s), light air cover with 4 A-Wings

One of the new hot lists that have been going around with Wave 2 hitting in full blast is the CR90s with Turbolaser Reroute Circuits.  Frankly, the TRCs are probably the best upgrade you can have on a ship with redundant evade tokens, and having them on a super maneuverable platform like the CR90 is just icing on the cake.  Yes, we all know that CR90s evaporate under dedicated firepower, but what can you expect if you're running a ship with barely any shields and equally pathetic hull.  That's not the point.  The point when you're running a good amount of CR90s is getting either the most mileage out of the evades as you can (Mon Mothma), or just wrecking havoc with consistent damage via Ackbar in the Home One.

What do I mean by this?  I mean you run a list that looks something like this:

ACKFISH
Author: HERO

Faction: Rebel Alliance 
Points: 390/400 
Commander: Admiral Ackbar

Assault Objective: Most Wanted
Defense Objective: Fire Lanes 
Navigation Objective: Superior Positions 

[ flagship ] MC80 Command Cruiser (106 points)
-  Admiral Ackbar  ( 38  points) 
-  Home One  ( 7  points) 
-  Intel Officer  ( 7  points) 
-  Engine Techs  ( 8  points) 
-  Electronic Countermeasures  ( 7  points) 
-  XI7 Turbolasers  ( 6  points) 
-  Leading Shots  ( 4  points) 

CR90 Corvette A (44 points)
-  Tantive IV  ( 3  points) 
-  Turbolaser Reroute Circuits  ( 7  points) 

CR90 Corvette A (44 points)
-  Jaina's Light  ( 2  points) 
-  Turbolaser Reroute Circuits  ( 7  points) 

CR90 Corvette A (44 points)
-  Turbolaser Reroute Circuits  ( 7  points) 

1 Tycho Celchu ( 16 points) 
3 A-Wing Squadrons ( 33 points) 

The first upgrade you take on the CR90A.

Yes, I know I'm not very creative with names, and I've only played one game with the list above, but I can tell you that it does work, and work very well.  The entire fleet swims horizontally or on a diagonal, doing nothing but Concentrate Fires for the most part and throwing extra reds so Ackbar can feed them with free accuracies if you don't score big damage.  You have 4 activations on ships and decent fighter cover so you can hopefully tie down bigger squadron lists while your ship pound the opposing fleet into the ground.  Jaina's Light allows the ship to be tricky and shoot through your own ships while Tantive IV throws out free navs (for Engine Techs) and repair tokens (6 engineering points) onto the Home One when its not using CF.

When you have 3 CR90 under Ackbar, damage can be borderline obscene not because of the sheer number of dice you're throwing out (4 from the side with CF), but because of free double hit results from the TRCs.  If you math it out, you can clearly see that 1 dice out of 4 will be a blank on average when you throw it out.  However, Home One can instantly turn one of those blanks to a accuracy if you so desire, or you can flip an evade for free damage.  Most of the time I'll take the extra damage, but there will be times where your opponents' ships will be withered enough that you'll want to direct the damage to a specific hull.  If anything, you'll pepper them with so many shots and you'll burn up a lot of Redirects and side shields from the biggest capital ship threats so your Home One herself can start laying in some pain.  There has been times where this little ship has rolled a double-hit, hit, crit and a blank, with me turning that into another double.  That's 6 damage coming from a ship worth 51 points, and consistently outperforms the MKII in terms of damage overall.

I think if we're looking at the list I presented above in relation to the meta, I think it's in a spot where it can do quite well.  Having 4 ships in your list with a 390 bid is a very, very good thing.  It has a very high chance of winning first player, and with 1 more ship over the average count of ships being fielded, you're looking at a good chance of going first and last, which is huge in terms of activation advantage.  The Tycho and 3x A-Wings is not the best thing in the world, but with careful play and positioning you should be able to tie up some Fireball lists for a turn or two so you can hopefully burn down the rest of the fleet.  It's a worrisome thing to know that it doesn't take much to kill a CR90, especially from a Fireball, but at least you will be able to throw out insane amounts of pain for relatively dirt cheap.  Now that is truly the meaning of cost-effectiveness.  The only thing that's not cost-effective is the fact you have to buy 3x MC30c expansions to get the TRCs, but good thing I already have that.  Oops.

Tuesday, December 15, 2015

Armada: HTTs vs. XI7s

Turboing those lasers.

Alright, let's get down to business right away with this topic.  Personally, I think XI7s are the best offense upgrade in the game.  Not including things like Gunnery Team or Intel Officer because those are more utility pieces, I view XI7 as a damage pusher and nothing else.  If you want raw damage, XI7s are the best go-to turbolaser upgrade on a ship that can throw a good amount of dice.  For tiny ships like CR90s or MC30cs that can push damage with TRCs due to their double Evade, I would strongly recommend those on those kind of ships.  However, when it comes to any of the bigger ships; including but not limited to the ISD and MC80, the Rebel Assault Frigates can also benefit from doing more damage as long as they have Ackbar on the field.

Now, what about Heavy Turbolaser Turrets and do they have a use?  Yes, I do they have a use but they have a more specific use.  They're not as flexible as the XI7s because of a number of things.  They are useless on ships that do not have a Brace option, they are weaker in the current metagame because more ships that matter have Redirect, and they generally push less damage when Brace is not available. Both the XI7s and HTTs benefit from ships that can throw a lot of dice, because you want to be able to push out as much damage as possible on certain hull zone.  Remember the wording I'm using here:  Specific hull zone.  More on this later.  It's also really important to note that the more dice you throw, especially when you throw both red and blues that your chances to score an accuracy result goes up dramatically.  There's simply more chances you will be able to lock down the Brace token as a result.

Let's pretend that the target that you're shooting at is an Imperial Star Destroyer at full health into the front hull zone.  That means the sucker is packing 11 hull points, 4 shields in the front and 3 on each side.  Now, let's say that you roll some big dice and score 8 hits on the sucker.

Decisions..

Heavy Turbolaser Turrets:
  • With Brace available, the opponent elects to only brace and take 4 damage to frontal shields.
  • Without Brace available, the opponent elects to redirect to the left hull zone, takes 4 to the front, all 3 shields on the left, and takes 1 damage directly to the hull.
  • On the second shot assuming the same number of hits, and with Brace available, the opponent elects to only brace and take 4 damage directly to the hull.
  • On the second assuming the same number of hits, but without Brace available, the opponent elects to redirect to the right, saving 3 damage, and takes 5 damage directly to the hull.

..decisions.

XI7 Turbolasers:
  • With Brace and Redirect available, the opponent elects to brace, redirect 1 to the left/right hull zone, and take 3 damage to frontal shields.
  • Without Brace available, the opponent elects to redirect to the left, can only redirect one, so he takes 7 to the front, losing all shields and taking 3 damage directly to the hull.
  • On the second shot assuming the same number of hits, and with Brace available, the opponent elects to only brace and redirect right, and takes 3 damage directly to the hull.
  • On the second assuming the same number of hits, but without Brace available, the opponent elects to redirect to the right, saving 1 damage, and takes 7 damage directly to the hull.

As you can see here, the XI7s outperform the HTTs when you want to damage directly to a certain hull zone.  Most of the time, depending on your strategy and fleet construction, you want to put out higher, more consistent damage onto a naked hull zone (no shields) so you can push unmitigated damage onto the ship as fast as you can.  HTTs do something that's somewhat opposite of that in some cases, because it's a defensive combo-stopper.  It's strongest point is that it forces your opponent to Brace and only Brace if he wants a chance at reducing the savage amount of damage that's being inflicted these days by ISDs and MC80s.  If he does anything else like Evade or Redirect, he's simply going to eat a greater amount of damage.

Something that I haven't mentioned here but I mentioned earlier is that XI7s are much better when shooting at ships like MC30cs and CR90s, two ships that I see a good amount of in the current Wave 2 meta.  Why?  Because they only have Redirects as their primary source of damage reflect outside of Evade.  If you throw say, 4 damage into the CR90 from long range, HTTs have absolutely no effect on that outcome.  Your opponent will still be able to Evade and Redirect whereas for the XI7s, their Redirect will be severely weakened.  On the opposite end of the spectrum, Raiders have Brace with double Evades, so 4 damage on them will result in a brace for 2 for 2 shields.  With XI7s, you will also do 2 damage after Brace because there's no ability to Redirect.  It only gets complicated when you're shooting at ships with all 3 evasive options such as Assault Frigates and Gladiators.  HTTs makes it so they can't evade or redirect if they want to brace to full effect, so they will beat XI7s in that regard as long as a lot of damage is being inflicted where Evade, Brace and Redirect can ALL contribute to the damage result.  Like if an MC80 Assault is shooting with Concentrated Fire at long range with the Defiance title with Ackbar and HTTs and manages to score big numbers, then yeah, it's probably going to do more damage to that Assault Frigate at long range than XI7s.  More than likely though, when it's just Brace and Redirect, XI7s will outperform HTTs when it comes to doing damage.

Lastly, I want to mention the key factor when determining realistic battlefield conditions in Wave 2.  Ships are throwing more dice and with more dice comes more accuracies.  That means the chances you will completely negate Brace is pretty high, especially on ships without ECM.  Furthermore, Home One hands out free accuracies without reducing damage in most cases and Intel Officers can permanently erase Brace.  If your goal is to spread damage, and your battleplan will be doing damage from long range, against ships that can Evade, Redirect and Brace on the same attack, and don't care about accuracies, then HTT is a cheaper, more effective option than XI7s.  For everything else, XI7s simply do more damage to a specific hull zone, works better vs. the current meta, and works better in conjunction with accuracy dice.

Good luck, and good hunting admirals.